Officially

Officially
Officially....Mr. & Mrs. LeBlanc

Harry Potter Canvas Subway Art


I just finished this project last night. I have to say I love how it turned out! We are huge Harry Potter fans in this house, so, after finding a similar idea online (it was a digital print found HERE on etsy) I decided to make it into a canvas subway art project for my sons room. I used a 16x20 canvas. I mixed gesso and a tiny amount of light tan acrylic paint to prepare the background surface. I wanted it to look a little "aged", so I made it look a bit streaky. I even used my fingers and rubbed some of the tan color around the edges. I let it dry completely, and then started to place the vinyl lettering on. If you've ever tried putting vinyl on canvas, it's a pain. The gesso really helps in giving the vinyl a little more to adhere to. That's the best way I can describe it. :)

I printed the vinyl in three colors. The chocolate brown was done in one piece, the tan and burgundy were printed out and then placed on in separate pieces. I sealed the entire canvas with a good coating of matte mod podge. I may add a little more of an "aged" look to the edges, but for now, I am in love with it! I'm pretty sure my son is going to love seeing it hanging on his bedroom wall!

Chalkboard Crossword Art

Happy Canadian Thanksgiving! I love this time of year. I live in Moncton, NB, and the colors of the leaves right now are so beautiful. I took a panoramic of my front yard...well, part of it. We have the cutest little green house, called the "Libra House". I didn't name it, but it suited me well because I am a Libra. So, the name stuck. Isn't the view beautiful? I love it.


I've been working on a lot of projects lately. I turned this frame into a big chalkboard. I should have taken a picture of the before. It was quite the looker. It was an ugly brown frame and had a hideous vase of flowers. I'm sure in it's own time it was beautiful. Because I've been painting walls, I had a can of primer, so I gave it a good coat. I then used a satin white paint over that. I took a chance and bought a small jar of chalkboard paint from walmart. It was only $8, give or take a bit, and I was really impressed with how it turned out. Because the print was a canvas like texture, I put a coat of primer on it as well. It took about 3 coats of chalkboard paint to get a good coverage. I let it 'cure' for a day, and then I took my piece of chalk, turned it sideways, and colored the entire surface. I've had a few sayings on it since it was finished. It's great for birthdays, holidays, and for those inspiring quotes that I love to collect. I always give credit where credit is deserved. I found the idea at newlywoodwards.com. You can find the link HERE.


You are my sunshine


My brothers little girl, Ava, was diagnosed with a brain stem tumor at the age of 3. She is a little miracle child. She is adorable. She is precious. She is an angel.

I made this canvas for her, as well as another one for a fund raiser they had. I cut the paper to 12' widths, and then mod podged them onto the canvas. I applied the vinyl, and then distressed the edges with an antiqued pink color. I then put another coat of mod podge, in satin finish, to seal everything. So adorable....just like Ava.

I heard her singing this song one morning, and when I peaked into the room, she was running her fingers along the words as she sang.

Ava...you are MY sunshine. You make me happy when skies are grey. You will never know dear, how much I LOVE YOU!


Baby Boy Nursery Dots

I was so excited to do a baby BOY nursery room. I love how it turned out! Navy blue, sky blue, lime green, white and a hint of yellow. Looks adorable! Now I can't wait to meet little Lucas... :)

"In this House" - Pre-Designed Subway Art

I absolutely LOVE subway art and if I could get away with putting it up ALL over my home, I would. I also LOVE reading this because ... it's so true! I love my family and whenever we read these reminders, we all smile! I'm in the process of printing this out, so once it's on my wall, I will post that picture as well. (colors and size can be customized...feel free to email for more info)

Inexpensive and FUN Valentines Day Gifts


I love Valentines Day, but it isn't a holiday that I go all out for decorating. I usually tend to just put a few things on my window ledge in the kitchen. This is what it looks like this year. Nothing fancy! :)

All three projects are cute and inexpensive. The stacking trio hearts were made from some left over 2x4's. I painted the blocks red, then changed my mind and painted them black. I sanded the edges and ended up really liking the red showing through anyways. I mod podged the paper onto the front of the wood and then gave the entire thing a coat of mod podge

The Cubes were mentioned in a previous post (see below this one). The "i love you because..." frame was made after finding a similar idea on pinterest. Such a cute way to remind those we love about the little things that matter. The paper is changeable and the messages are written with a dry erase marker. So cute! Here is a closer look:

Valentines Day Cubes

Mod Podge scrapbook papers to the sanded and painted cubes. Place vinyl lettering on 5 of the sides, and it makes an adorable Valentines day decoration or gift! Personalized sayings (ie. names/dates or anything special for you) would make it an even more memorable gift. I had one customer say it would be a very unique and creative way for someone to propose. Cute idea!

Playroom Vinyl

A very patient customer of mine was so kind to send a picture of the vinyl lettering that she put up in her childrens playroom. Looks great!
Finished size: 15" x 22"
Price: $18

Harry Potter Quote by Dumbledore

In honor of my son, who is quite consumed with Harry Potter movies right now, I found this quote by Albus Dumbledore. I have gone through some darker times in my life, because of the trials we've been given. This is a great reminder...


Vinyl lettering is available to purchase!

Custom Name Blocks

 Block sizes range from 4" to 7" tall and they are all 2.5" wide.
 Prices: $3.00 per block - which includes your choice of background papers.

I love making these blocks! They are a fun and inexpensive way to decorate or give as a gift. They are especially fun because they can be personalized to names you won't find in any stores.


Vinyl cutter...how I've missed you!

I have been without a vinyl cutter for a few months now, and I am SO very happy to say that I am up and running again. Finally! I've also been very addicted to Pinterest lately. There are so many amazing ideas to be found. Thanks to Kristy @ next to heaven, I found this great idea for a weekly calendar. It's adorable and I love the fact you can change the background papers for any season or holiday. Here is my finished weekly calender...


Here is the link to Kristy's site, where I found the idea: http://fey-next2heaven.blogspot.com

Subway Art for Keurig Coffee/Hot Chocolate Machines


I've been staring at this spot on my Keurig coffee machine for months now, and I've finally come up with what I think is a pretty darn cute subway art design. Although we basically make hot chocolate with this, it was fun to use all those fun words that you may see in your favourite coffee shop. Since most machines are different sizes, custom orders are welcomed!

More Subway Art - Family Rules and Manners

I love love love these!
They look great on a shelf, counter,
leaning against a wall, anywhere really!


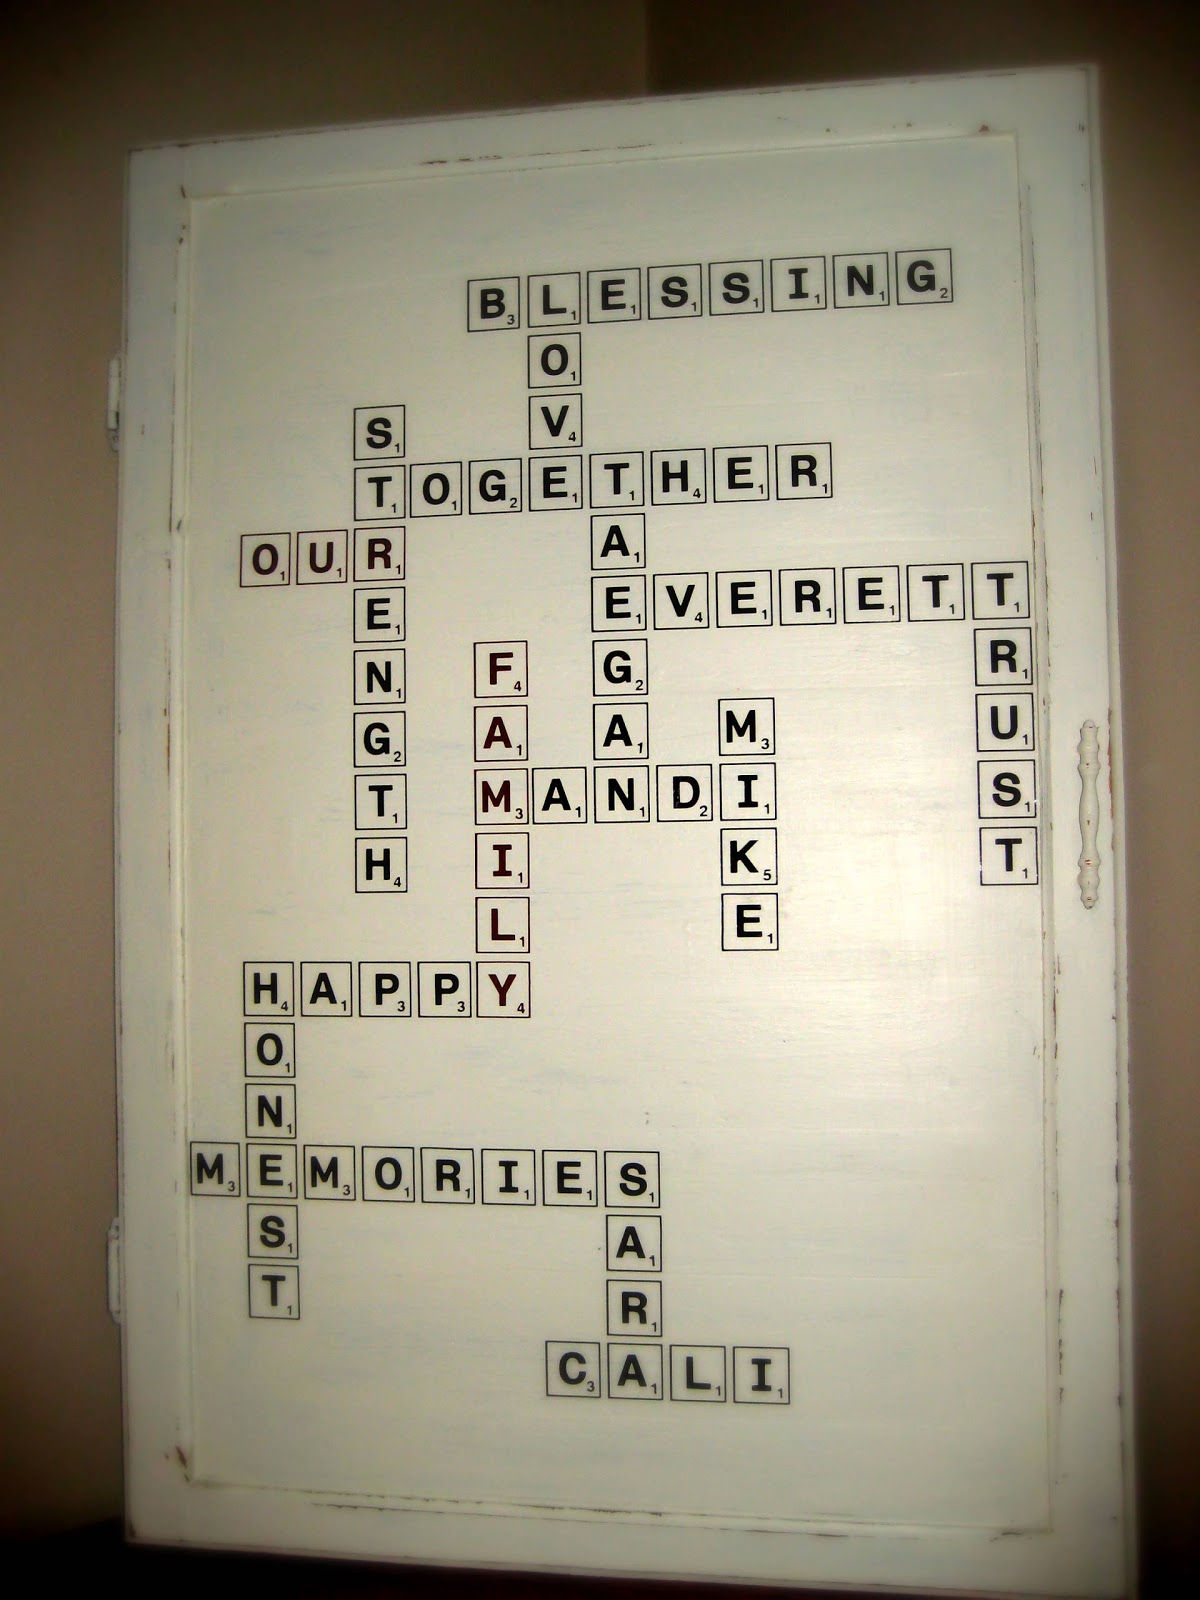
Scrabble Family Collage

I had so much fun putting this together! I had come across some really nifty old cabinet doors. I used some wood filler to fill in the 'cracks', painted, sanded and...voila...an adorable Scrabble Family Collage. The only thing I am going to change is the words "our" and "family". They are done in burgundy, although you can't really tell. So, I'm going to re-do them, still in burgundy, but have them solid red with the letters taken out. Hard to explain, but I'm sure you understand! I'll re-post the picture when I'm done. I just had to add this picture NOW because I think it's so fun!

Valentines Subway Art

Subway Art - another favorite thing I have become addicted to. This is the second class project I'm offering on Jan 22nd and 29th. Finished size is 12x12.

Vinyl lettering on canvas!

I admit, I'm addicted to Mod Podge. There are soooo many fun projects that can be done with this amazing stuff. This was a class that I had taught, a few years ago, and it has been a HUGE success. Pinned more times than I can imagine. How I made it: I bought an 11x14 canvas at the dollar store. I cut various papers to size, making sure they fit before fixing them permanently. If I was going to paint the canvas, do that first. I wanted the edges to be white. Using a satin mod podge, I glued the strips of paper down, one at a time. I made sure to press them down really well, getting as many bubbles out as possible so it layed flat. I printed out the vinyl words with my cutter, and then placed them on the papers. I put another coat of mod podge on top of the entire project. You can always embellish with ribbons, washi tape, buttons, etc. etc. All personal preference!

A collection of some Christmas Vinyl Lettering Projects - Cabinet Doors, Tiles, Charger Plates and Subway Art!

 I love using old cabinet doors to create something fun and unique. This christmas collage has to be one of my favorite projects this season!
 A fun way to say "Christmas"...on a 12x12 tile
 Stacker Blocks
 This is a beautiful white tree. I used a layer of matte modge podge over it, which gives a great finished effect.
 Another favorite christmas collage using an old cabinet door. Painted white, left the hinges and handle on...and it makes a great christmas decoration!
 Red charger plate with a beautiful white vinyl saying on it. The ideas are endless with these plates!
 I love this one! Silver, white and black - very appealing and makes a great gift!

 Okay, I admit I'm addicted to the dollar store. They have the cutest things! This red shiny plate looks even better with a cute vinyl saying on it.
 Subway Art - one of my new and absolutely MOST favorite things to do. I could have these things up all over my home! :) I did this particular style with a green background...see picture below.

1/2 Reverse Technique - Flower Wall Lettering

I've been wanting to try this for quite sometime now. It's another "reverse" technique, just using half of the graphics though. I'm happy with how it turned out! :)

Picture Boards

 Finished size 11.5" x 11.5"...holds a 4x6 photo that can be interchanged. A fun project and a great addition to your home. Makes a great gift too!


One of the best ways to have Heaven in your home...

A customer recently sent me this quote, asking if I could come up with a design for her. I loved it so much I had to use it on my walls too!

Followers

Popular Posts